
Deliverable 12
Detailed sampling plan
Deliverable details
Deliverable title: Detailed Sampling Plan
Deliverable number: D12
Work package number: WP3
Lead beneficiary: University of Coimbra
Dissemination level: Public
Project start date: March 21th, 2025
Duration: 36 months
Delivery date: 28/02/2026
Version number: 1.0
Authors:
Reviewers
Name
Organisation
Version History
Version
1.0
Date
28-02-2026
Description
Draft
Disclaimer
The information and views set out in this document are those of the authors and do not necessarily reflect the official opinion of Biodiversa+, the European Union, or any other funding bodies. Neither these organizations nor any person acting on their behalf may be held responsible for the use which may be made of the information contained herein.
Statement of Originality
This document is a deliverable of the PHorestAll project and has been prepared in accordance with Consortium Agreement and the respective Grant Agreements each beneficiary established with its correspondent National Funding Organization. It is the original work of the consortium members, prepared with due care and based on the best available knowledge at the time of writing. Where information has been obtained from external sources, appropriate references have been provided. Duplication, distribution, or use of this document, in whole or in part, is permitted only with proper acknowledgment of the PHorestAll project and its consortium.
Objective:
These Standard Operational Protocols (SOP) outline standardized procedures for collecting air, needle, and soil samples. Soil sampling protocols distinguish between samples intended for microbiome analysis and bulk soil collected for physicochemical characterization. The SOP also detail soil processing methods, including the assessment of soil moisture, pH, particle size distribution, and fraction quality. In addition, it provides guidance on metadata recording and instructions for sample handling and shipping.
Additional resources, including explanatory videos, are available at:
https://drive.google.com/drive/u/2/folders/1ZkxExOYymGsG18hQriANWLnCSNsbw2dA
Before leaving each sampling site, make sure you’ve recorded all the information required to complete the table at the end of this protocol.
Air Sampling
Materials required:
- Air sampler (SKC ULTRA Passive Samplers SKC 690-105)
- Shelter for Outdoor Sampling (SKC 690-303)
- Water-based markers (do not use permanent markers or equivalent as these can off-gas VOCs)
- Latex or nitrile gloves
- Cooler with frozen ice packs (to store collected samples)
- GPS device or GPS-enabled smartphone
- Measuring tape (> 10 m)
- A camera or a smartphone with a high-resolution camera
- Printed table for metadata collection
- Permission to collect samples (if needed)
- Shipping material (dry ice, thermally isolated container)
Sampling Design:
At each location, select 1 sampling site to set up the shelter for outdoor sampling with an air sampler. Place samplers at breathing-zone height (~1.6 m). Samplers should be positioned in a location where they are unlikely to be damaged by wildlife. Avoid direct obstructions that block diffusion holes (do not mount against stems/trunks). Ensure sampler diffusion windows face unobstructed air. Mark the shelter with the project name label/logo.
Place the shelter with an air sampler at one of the points where forest bathing will take place and where the tree species that most represent the selected location are present. The sampler should remain in place for 6 weeks, corresponding to the duration of the forest interventions, and then be removed.
Sampling procedure:
- Open the pouch and remove the sampler.
Do not discard pouch.
Store pouch in a clean, organic solvent-free environment. - Record the following:
Sample ID on pouch
Sampling location on the pouch
Date sample taken on pouch
Do not use permanent markers or equivalent, as these can off-gas VOCs. - Start sampling:
Slide sampler cover to open position (diffusion holes visible). Write the sample start time and date on the pouch label. - Clip sampler inside shelter. Ensure diffusion holes in the sampler are not obstructed in any way.
- Securely install the shelter for outdoor sampling on the tree branch. Securely attach the shelter with air sampler to a tree branch using a string to prevent it from falling off.
- Sampling:
Leave the open sampler in the shelter for the recommended period (6 weeks). - Stop sampling:
Slide sampler cover to closed position (arrow and SKC visible). Write the sample stop time and date on the pouch label. - Place the sampler in its resealable pouch immediately after sampling. Ensure the sample ID on the sampler matches the sample ID on the pouch.
- Seal the pouch and place it in the container with the cool pack.
- Use expedited shipping to send a sample to a laboratory (NLZOH SI) for analysis on dry ice in a thermally isolated container (or in a cooler with ice packs) as soon as possible (within 72 hours).
Prvomajska ulica 1
2000 Maribor
Slovenia


Needle Sampling
Materials required:
- Pruning shears or pole pruners (for accessing higher canopy parts).
- Sterile glass bottles with caps
- Water-based markers (do not use permanent markers or equivalent as these can off-gas VOCs)
- Latex or nitrile gloves
- Cooler with frozen ice packs (to store collected samples)
- GPS device or GPS-enabled smartphone
- Measuring tape (> 10 m)
- A camera or a smartphone with a high-resolution camera
- Printed table for metadata collection
- Permission to collect samples (if needed)
- Shipping material (dry ice, thermally isolated container)
Sampling Design:
At each location, identify 5 sampling sites selected for forest therapy sessions, focusing on areas with mixed coniferous stands (e.g. spruce – fir associations). If spruce or fir are scarce, include pine (Pinus spp.). If the forest is composed of other tree species, sample those coniferous tree species that are most common in the selected location.
Select three (3) individuals per target species (fir and spruce) at all five points where a stop is planned as part of the forest bath, to ensure statistical representation. Integrate with trail features: use the trail's educational stops for therapy program design.
Ensure sites are located in natural, undisturbed forest sections; avoid areas near roads or cleared land to minimise contamination.
Criteria for trees:
- Fully formed and medium-aged (e.g., 20–50 years, trunk diameter >20 cm at 1,3 m height).
- Healthy appearance: No visible signs of mechanical injuries, pests, pathogens, or disease (e.g., bark damage, needle discolouration).
- Space selections evenly along the trail at different stopover points (e.g., one near the start, one in the first half, one mid-trail, one in the second half, one near the end) to capture variability.
Sampling procedure:
Weather Conditions: Sample on a sunny day with no recent precipitation (at least 24 hours dry). Target midday (around noon) when terpene volatility is higher due to warmth and light.
Collection Method:
- Approach the selected sampling point and record the following details: Species, GPS coordinates, estimated height [in m], trunk circumference [in cm] at a hight of 1,3 m, canopy description, and photos.
- At each sample point, collect needles from 3 trees of different species (e.g. one spruce, one fir, one pine) if available. If not, collect 3 samples from the most abundant species.
- Collect needles from three canopies at breathing-zone height (~1.6 m) in a glass bottle.
- Collect a sample from five sample points on the forest therapy trail in one labelled glass bottle, so that you obtain one mixed sample from all points and all tree species.
- Collect 50 – 100 g of fresh needles from each of the five stopover points (current-year growth preferred) using pruning shears. Focus on healthy, green needles fully exposed to sunlight.
- Store samples in a cooler with ice packs to prevent degradation (keep at 4–10°C).
- Use expedited shipping to send a sample to a laboratory (NLZOH SI) for analysis on dry ice in a thermally isolated container (or in a cooler with ice packs) as soon as possible (within 72 hours).
Prvomajska ulica 1
2000 Maribor
Slovenia
Soil Sampling
Materials required:
- Core sampler
- Hammer or mallet (to assist in the insertion of the soil corer)
- 70% ethanol (for disinfecting gloves and tools)
- Distilled water container
- Clean brush (for removing soil debris)
- Cooler with frozen ice packs (to store collected samples)
- Field notebook
- GPS device or GPS-enabled smartphone
- Latex or nitrile gloves
- Measuring tape (> 20 m)
- Stakes or pin Flags (to mark sampling sites in each plot)
- Sterile zip-closure plastic bags, clearly labeled.
- Permission to collect samples (if needed)
- Camera or a mobile phone with a high-resolution camera
- Permanent markers
- Printed table for metadata collection
Sampling Design:
At each location (5 sampling sites per forest), establish a 20 m × 20 m plot. Within this plot, select and mark 5 sites distributed throughout the area, following an M- or W-shaped pattern. If a physical obstacle (e.g., rocks, trees, or other obstructions) is located near a designated sampling site, collect the samples 1 m from the obstacle (Figure 1). Two types of soil samples will be obtained: soil for microbiome analysis and bulk soil, used for assessing soil moisture, pH, fraction quantification and other physico-chemical analyses.
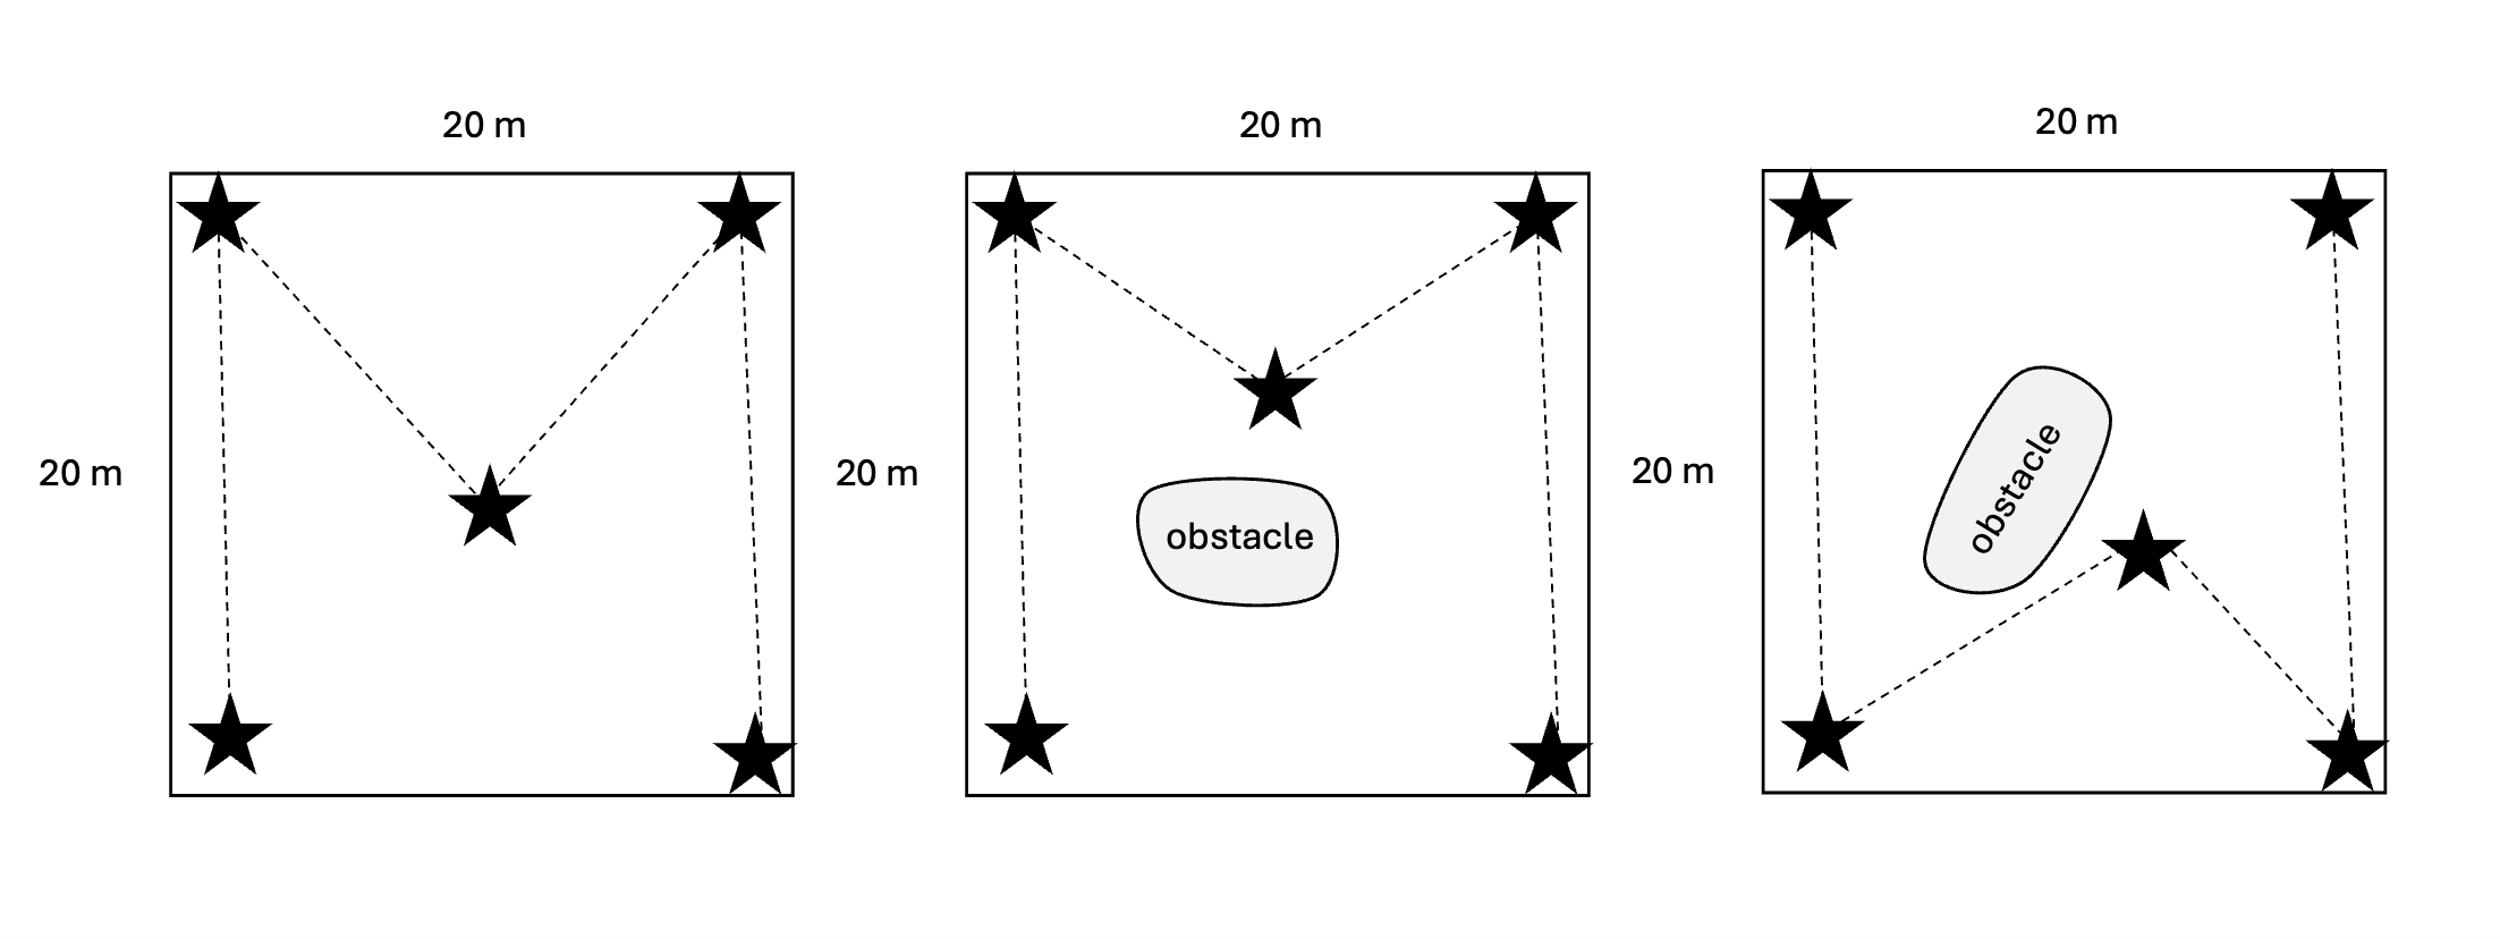
Figure 1: Examples of different field characteristics and how they may affect sampling.
Sampling procedure:
- Prepare the sampling sites: remove any vegetation, rocks, or surface debris.
- At each plot, collect soil from the top 0–10 cm at the 5 designated sampling sites (see sampling scheme, Figure 1) using a corer (preferably 5 cm diameter). At each site, retrieve two separate cores: one for microbiome analysis and one for bulk soil.
Microbiome samples: Wear latex gloves and place each core in a separate, properly labelled sterile zip-closure bag. Ensure all tools and materials are sterile to prevent cross-contamination.
Bulk soil samples: Sterility is not required, as these samples are intended for physical and chemical analyses rather than molecular work. Combine the five bulk soil cores from each plot into a single composite sample, properly labelled zip-closure bag. - Storage and Transport: Place all collected samples into a portable cooler with ice packs. Keep samples cool and out of direct sunlight until they can be transported to the lab.
Label samples as follows:
[Country Code]–[Plot ID.Site ID]–[Season Code]–[Year]-[Sample Type]
Example: PT-S1.1-S-26-M
Meaning:
PT → Country (Portugal)*
S1.1 → Plot 1 (1 to 5) and Site 1 (1 to 5)
S → Spring (use A for Autumn)
26 → Year of collection
M → Microbiome (use B for Bulk soil)
*PL - Poland; SI - Slovenia; TW - Taiwan; LT - Lithuania.
Soil Processing
Materials required:
- 2 mm sieve
- Access to a –80°C freezer
- Access to a 4°C refrigerator
- Drying oven (65 ± 5°C)
- Sample tray
- 500 mL glass beaker
- Deionized water
- Latex or nitrile gloves
- Sterile spatulas or spoons
- Labelled zip-closed bags
- Analytical balance (±0.01 g)
- pH meter
Microbiome Samples Processing:
Freeze samples for microbiome analysis at –80 °C as soon as possible. Samples should be shipped within a maximum of two weeks after collection. All bags must be clearly labelled and tightly sealed. Further information about sample shipment is provided at the end of this section.
Bulk Soil Samples Processing:
If immediate processing is not possible, store soil samples at 4 °C. Ensure that samples are properly sealed to prevent moisture loss.
Samples should be processed within 24–48 hours of collection to avoid changes in soil properties.
Before sending samples for fraction quality analysis, measure soil pH and moisture content, and fraction quantification.
Sample preparation
- Thoroughly mix the soil collected from the 5 sampling sites within each plot in a clean, dry container to obtain a representative bulk soil sample. Keep a portion of the homogenized bulk soil for Fraction Quality (FQ) analysis.
Soil pH measurement
- Transfer 2 g of well-homogenized soil from the previously prepared mixture into a clean container.
- Add 20 mL of deionized water.
- Mix thoroughly and measure the pH using a calibrated pH meter.
Soil moisture content determination
- Weight a 500 mL glass beaker to the nearest 0.01 g and record the weight. This beaker will be used to weight and oven-dry the soil sample.
- Fill the beaker with approximately 200 mL of well-homogenized, field-moist soil from the previously soil mixture.
- Weight the beaker plus soil to the nearest 0.01 g and record the weight.
- Place the beaker with the soil in a drying oven set at 65 ± 5°C and dry for 48 hours.
- Remove the samples from the oven and allow them to cool to room temperature (no longer than 30 minutes) before re-weighting.
- Record the oven-dry weight to the nearest 0.01 g.
-
Calculate the soil moisture content using the recorded weights as follows:
FM = Field-moist weight (glass beaker + moist soil)
OD = Oven-dry weight (glass beaker + dry soil)
T = Tare weight (empty glass beaker)
Fraction size quantification
- After determining soil moisture content, pass the dried soil through a 2 mm sieve to assess the proportion of coarse (>2 mm) and fine (<2 mm) fractions.
- Weight and record both fractions separately.
Fraction Quality (FQ) Analysis
- Sieve 400 g of the homogenized, representative bulk soil sample through a 2 mm mesh to remove coarse particles, stones, and roots.
- Transfer 250 g of the fine fraction (<2 mm) into a zipped plastic bag properly labelled. Leave the bag open to air-dry at room temperature, and store it in a clean, dry place until shipment.
- Store the remaining fine fraction in your laboratory as a backup, in a cool, dry environment, protected from moisture and contamination.
Shipping guidelines
Before shipping samples, please contact colleagues at the University of Coimbra to receive detailed instructions.
Ensure that all required permits are obtained and approved in advance. This includes:
- Sampling permits: Any local permit that may have been required for sampling cropland and natural ecosystems. If no permit was needed, please provide a signed letter confirming this.
- Export permits: Any export permit that may have been required to ship your samples. If no permit was needed, please provide a signed letter confirming this.
- Nagoya Protocol compliance: Please contact the Nagoya focal points in your country (https://absch.cbd.int/) to verify whether there are any legal requirements or restrictions concerning the use of these data for the proposed research project. Requirements may vary between countries. If no permit or notification is required, please request written confirmation from the competent authority (an email or letter from the responsible institution is sufficient). Additionally, please let us know whether your country or institution has any restrictions regarding the online deposition of these data in connection with publications.
- Material Transfer Agreement (MTA): Please sign and return the attached MTA template to formalize the transfer of materials and ensure compliance with institutional and legal requirements.
Samples for microbiome analysis must be shipped on dry ice using express shipping in a thermally isolated container (or in a cooler with ice packs).
Rua da Matemática, Nº 49
Edifício do Patronato, 3º Piso,
Laboratório de Microbiologia,
3000-276 Coimbra • Portugal
Metadata Collection
- Take at least one clear photograph of each plot, showing general vegetation structure, topography, and site characteristics.
- Record the sampling date (DD/MM/YYYY) and the GPS coordinates (latitude and longitude in decimal degrees, e.g., 40.376943, -8.366973) for each plot.
- Record dominant species within the 20 × 20 m plot in order of abundance. To assist with accurate identification, use the plant identification app iNaturalist.
- Assess plant cover:
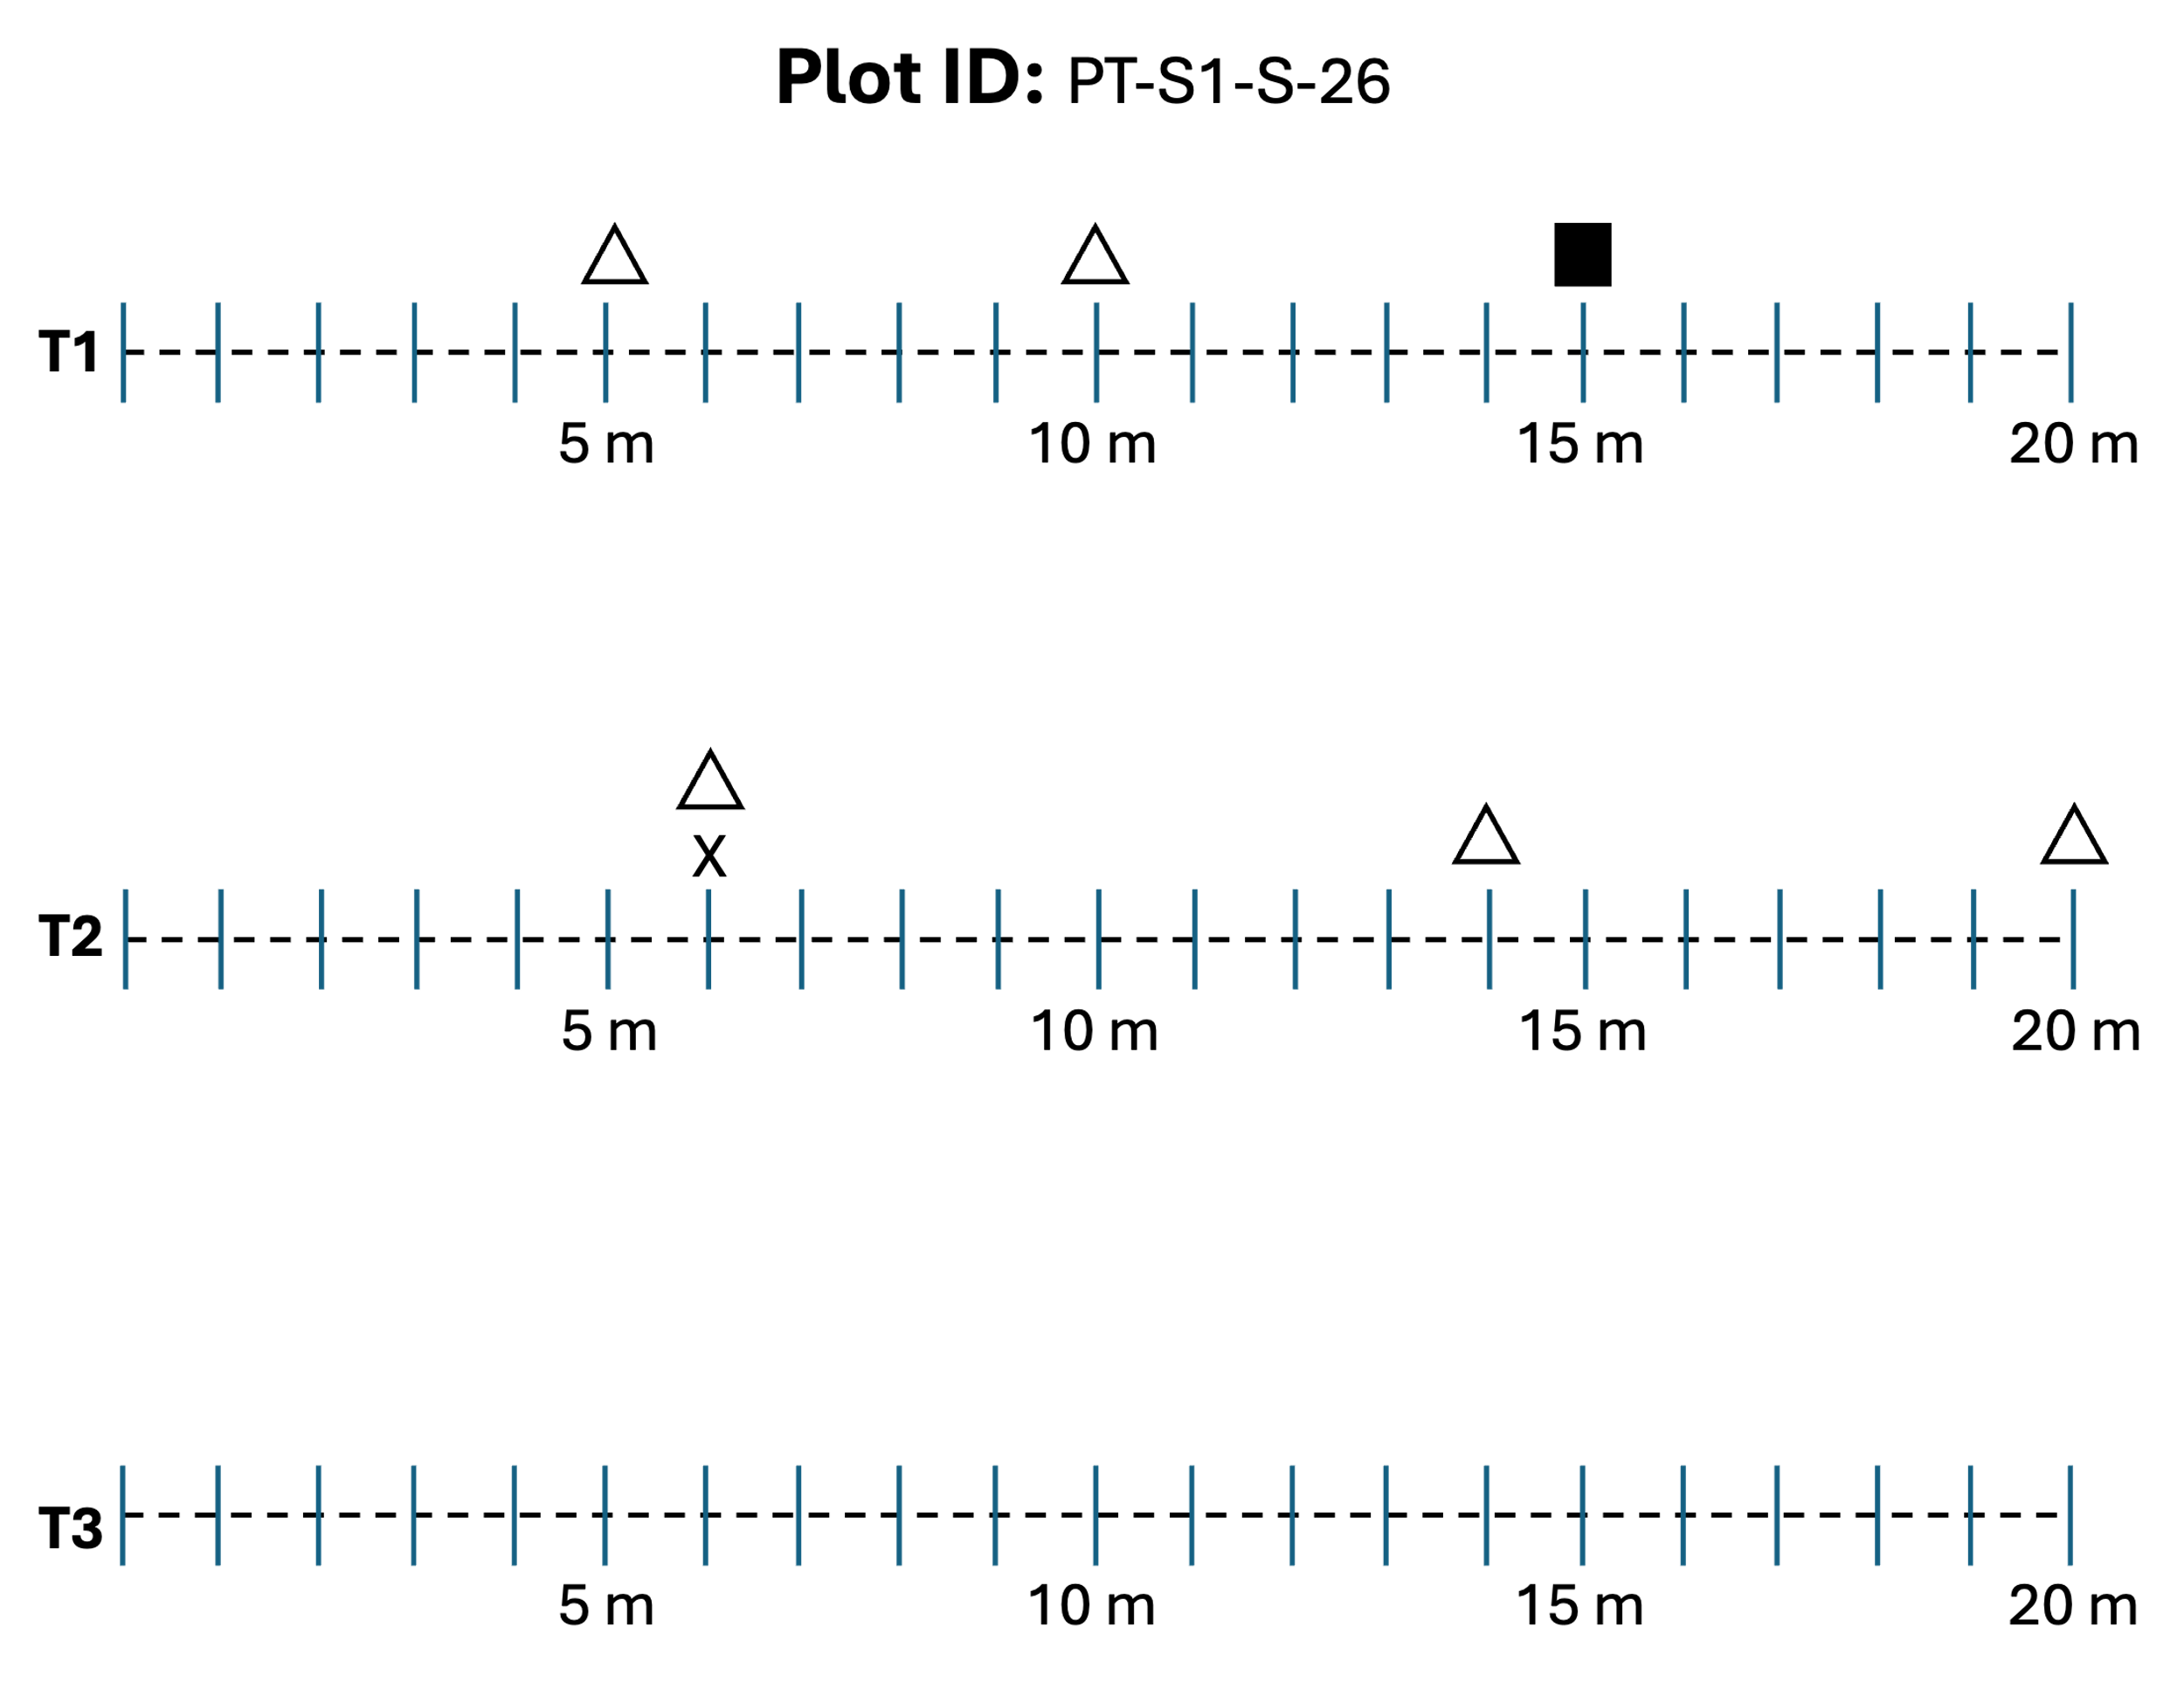
- Within each 20 × 20 m plot, establish 3 (T1–T3) 20 m transects (Figure 2).
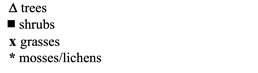
- Along each transect, record vegetation cover. Cover categories: bare soil (only when no vegetation is present), trees, shrubs, grasses, and mosses/lichens (biocrusts). Multiple layers can be recorded at a single point (e.g., tree above shrub above grass). For this, go to the metadata section and use Template 1 and consider Table 1.
Table 1: Definitions for each cover category.
| Vegetation type | Operational field definition | Key diagnostic criteria (field-based) | |
| Trees | Woody perennial plants with a single, clearly dominant main stem (trunk), regardless of current height (including juvenile individuals of 1–2 m). | Dominant apical axis; tree-like architecture; crown elevated above ground, even if still small. |  |
| Scrubs | Woody perennial plants of low stature, characterized by multiple stems and strong basal branching, with no clearly dominant trunk. | Absence of a single dominant axis; high degree of basal ramification; compact structure close to the ground. | 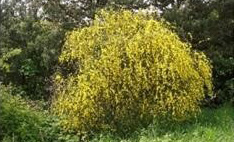 |
| Grasses (Herbaceous vegetation) | Non-woody plants, including grasses and other dominant herbaceous species, forming a continuous or semi-continuous ground cover, independent of phenological stage. | No lignified tissues; herbaceous stems and leaves; shallow, fibrous root systems. | 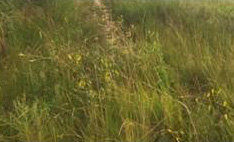 |
| Biocrust (Biological soil crust: mosses/lichens) | Surface soil communities composed of mosses, lichens, cyanobacteria, algae and fungi, forming a visible, cohesive crust at the soil surface, typically where vascular plant cover is absent or sparse. | Visible surface crust; soil particles bound together; dominance of cryptogamic organisms. | 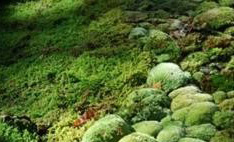 |
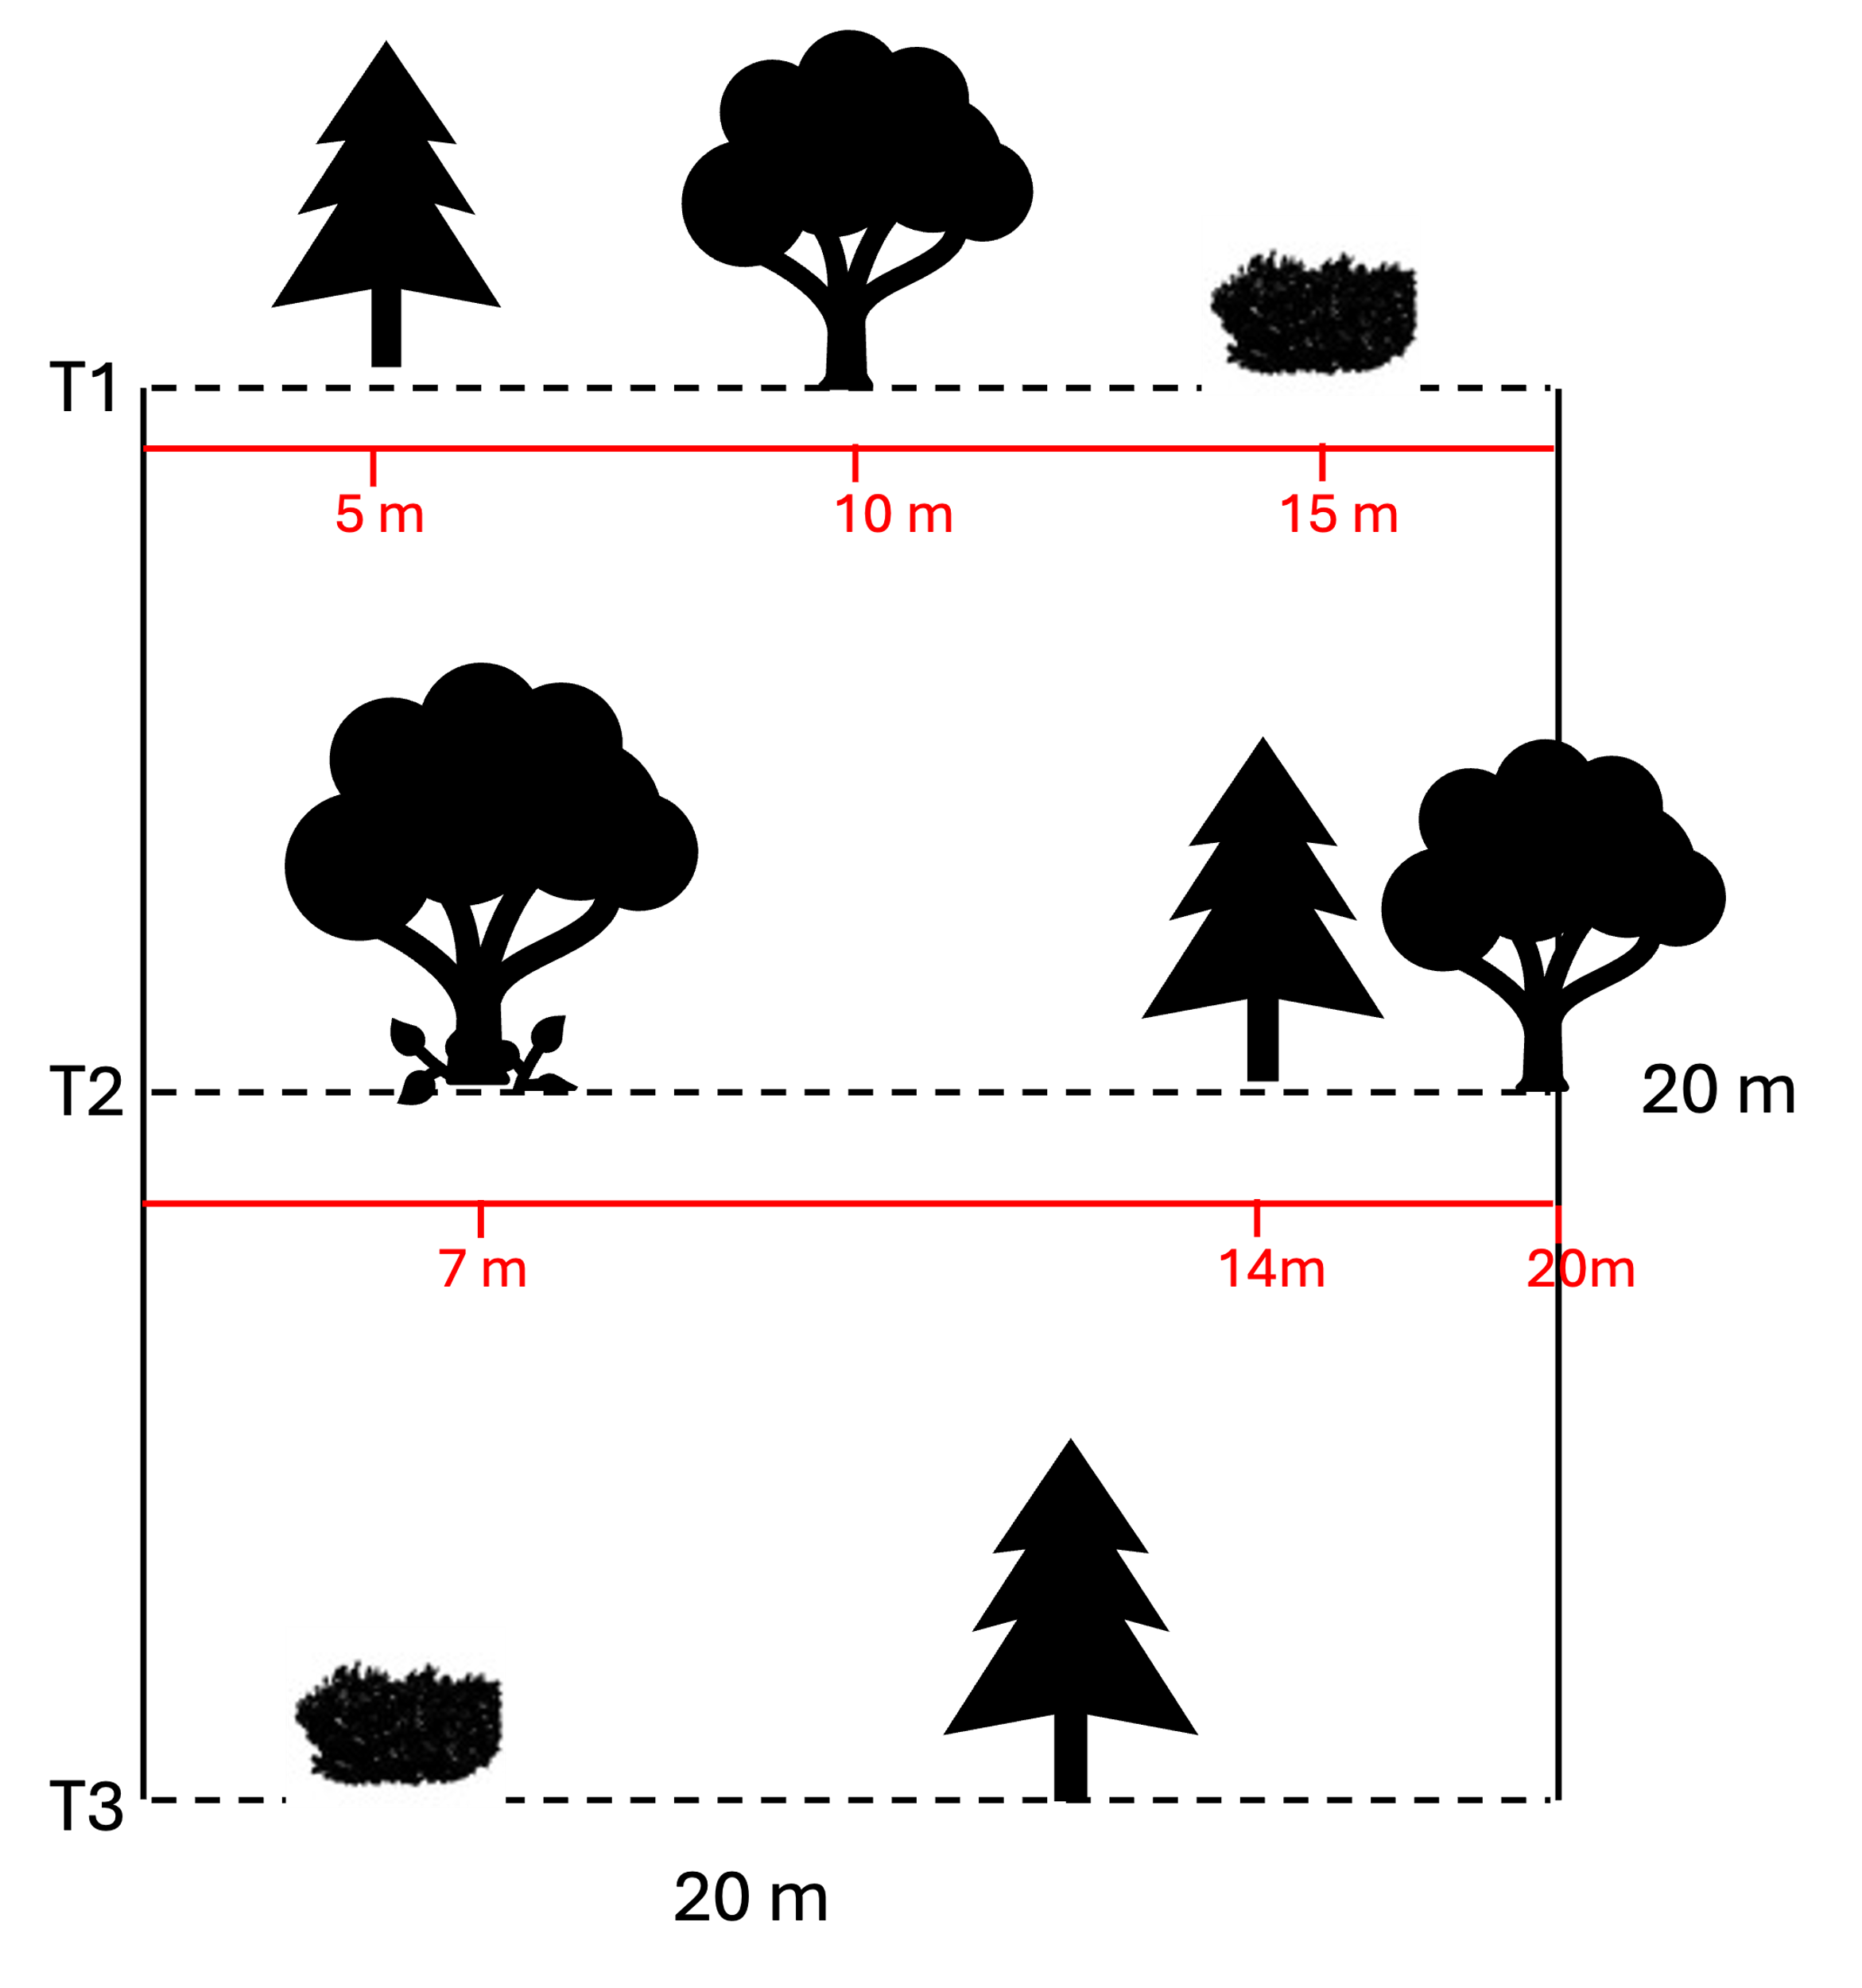
Figure 2: Example of transects to assess plant coverage.
Example:
T1 – 0–5 m (bare soil); 5 m (tree); 5–10 m (bare soil); 10 m (tree); 10–20 m (bare soil); 15 m (scrub); 15–20 m (bare soil).
T2 – 0–7 m (bare soil); 7 m (tree over grass); 7–14 m (bare soil); 14 m (tree); 14–20 m (bare soil); 20 m (tree).
- Assess tree density by counting all individual trees within each 20 × 20 m plot.
- Assess canopy cover (the percentage of the sky obstructed by tree canopy when viewed vertically upward) within each 20 × 20 m plot. Use the following visual scale: 0% (open sky), 25% (scattered trees), 50% (half shaded), 75% (mostly shaded), 100% (fully covered).
Table 2: Metadata table. Print one for each plot.
| Metadata Parameter | Instructions | Data Entry |
| Plot ID | Unique name/code for each plot (S1 to S5) | |
| Photograph taken? | Tick if done and include the filename [Country Code]–[Plot ID]–[Season Code]–[Year] |
☐ Yes / Filename: |
| Sampling Date | Format: DD/MM/YYYY | |
| GPS Coordinates | Decimal degrees: Latitude / Longitude (e.g. 40.376943, -8.366973) | |
| Dominant Species (in order) |
Considering the 20 × 20 m plot, use common/scientific names; |
1. 2. 3. |
| Plant Cover (per transect T1–T3) |
Coverage categories include bare soil, trees, shrubs, grasses, and mosses/lichens (biocrusts). | See Template 1 |
| Tree Density | Total number of trees in 20 × 20 m plot | |
| Canopy Cover | Estimate % cover per point; average all for total plot | |
| Observations | Additional plot observations not included in the metadata table (e.g., unusual vegetation, signs of disturbances, etc). |
Template 1:
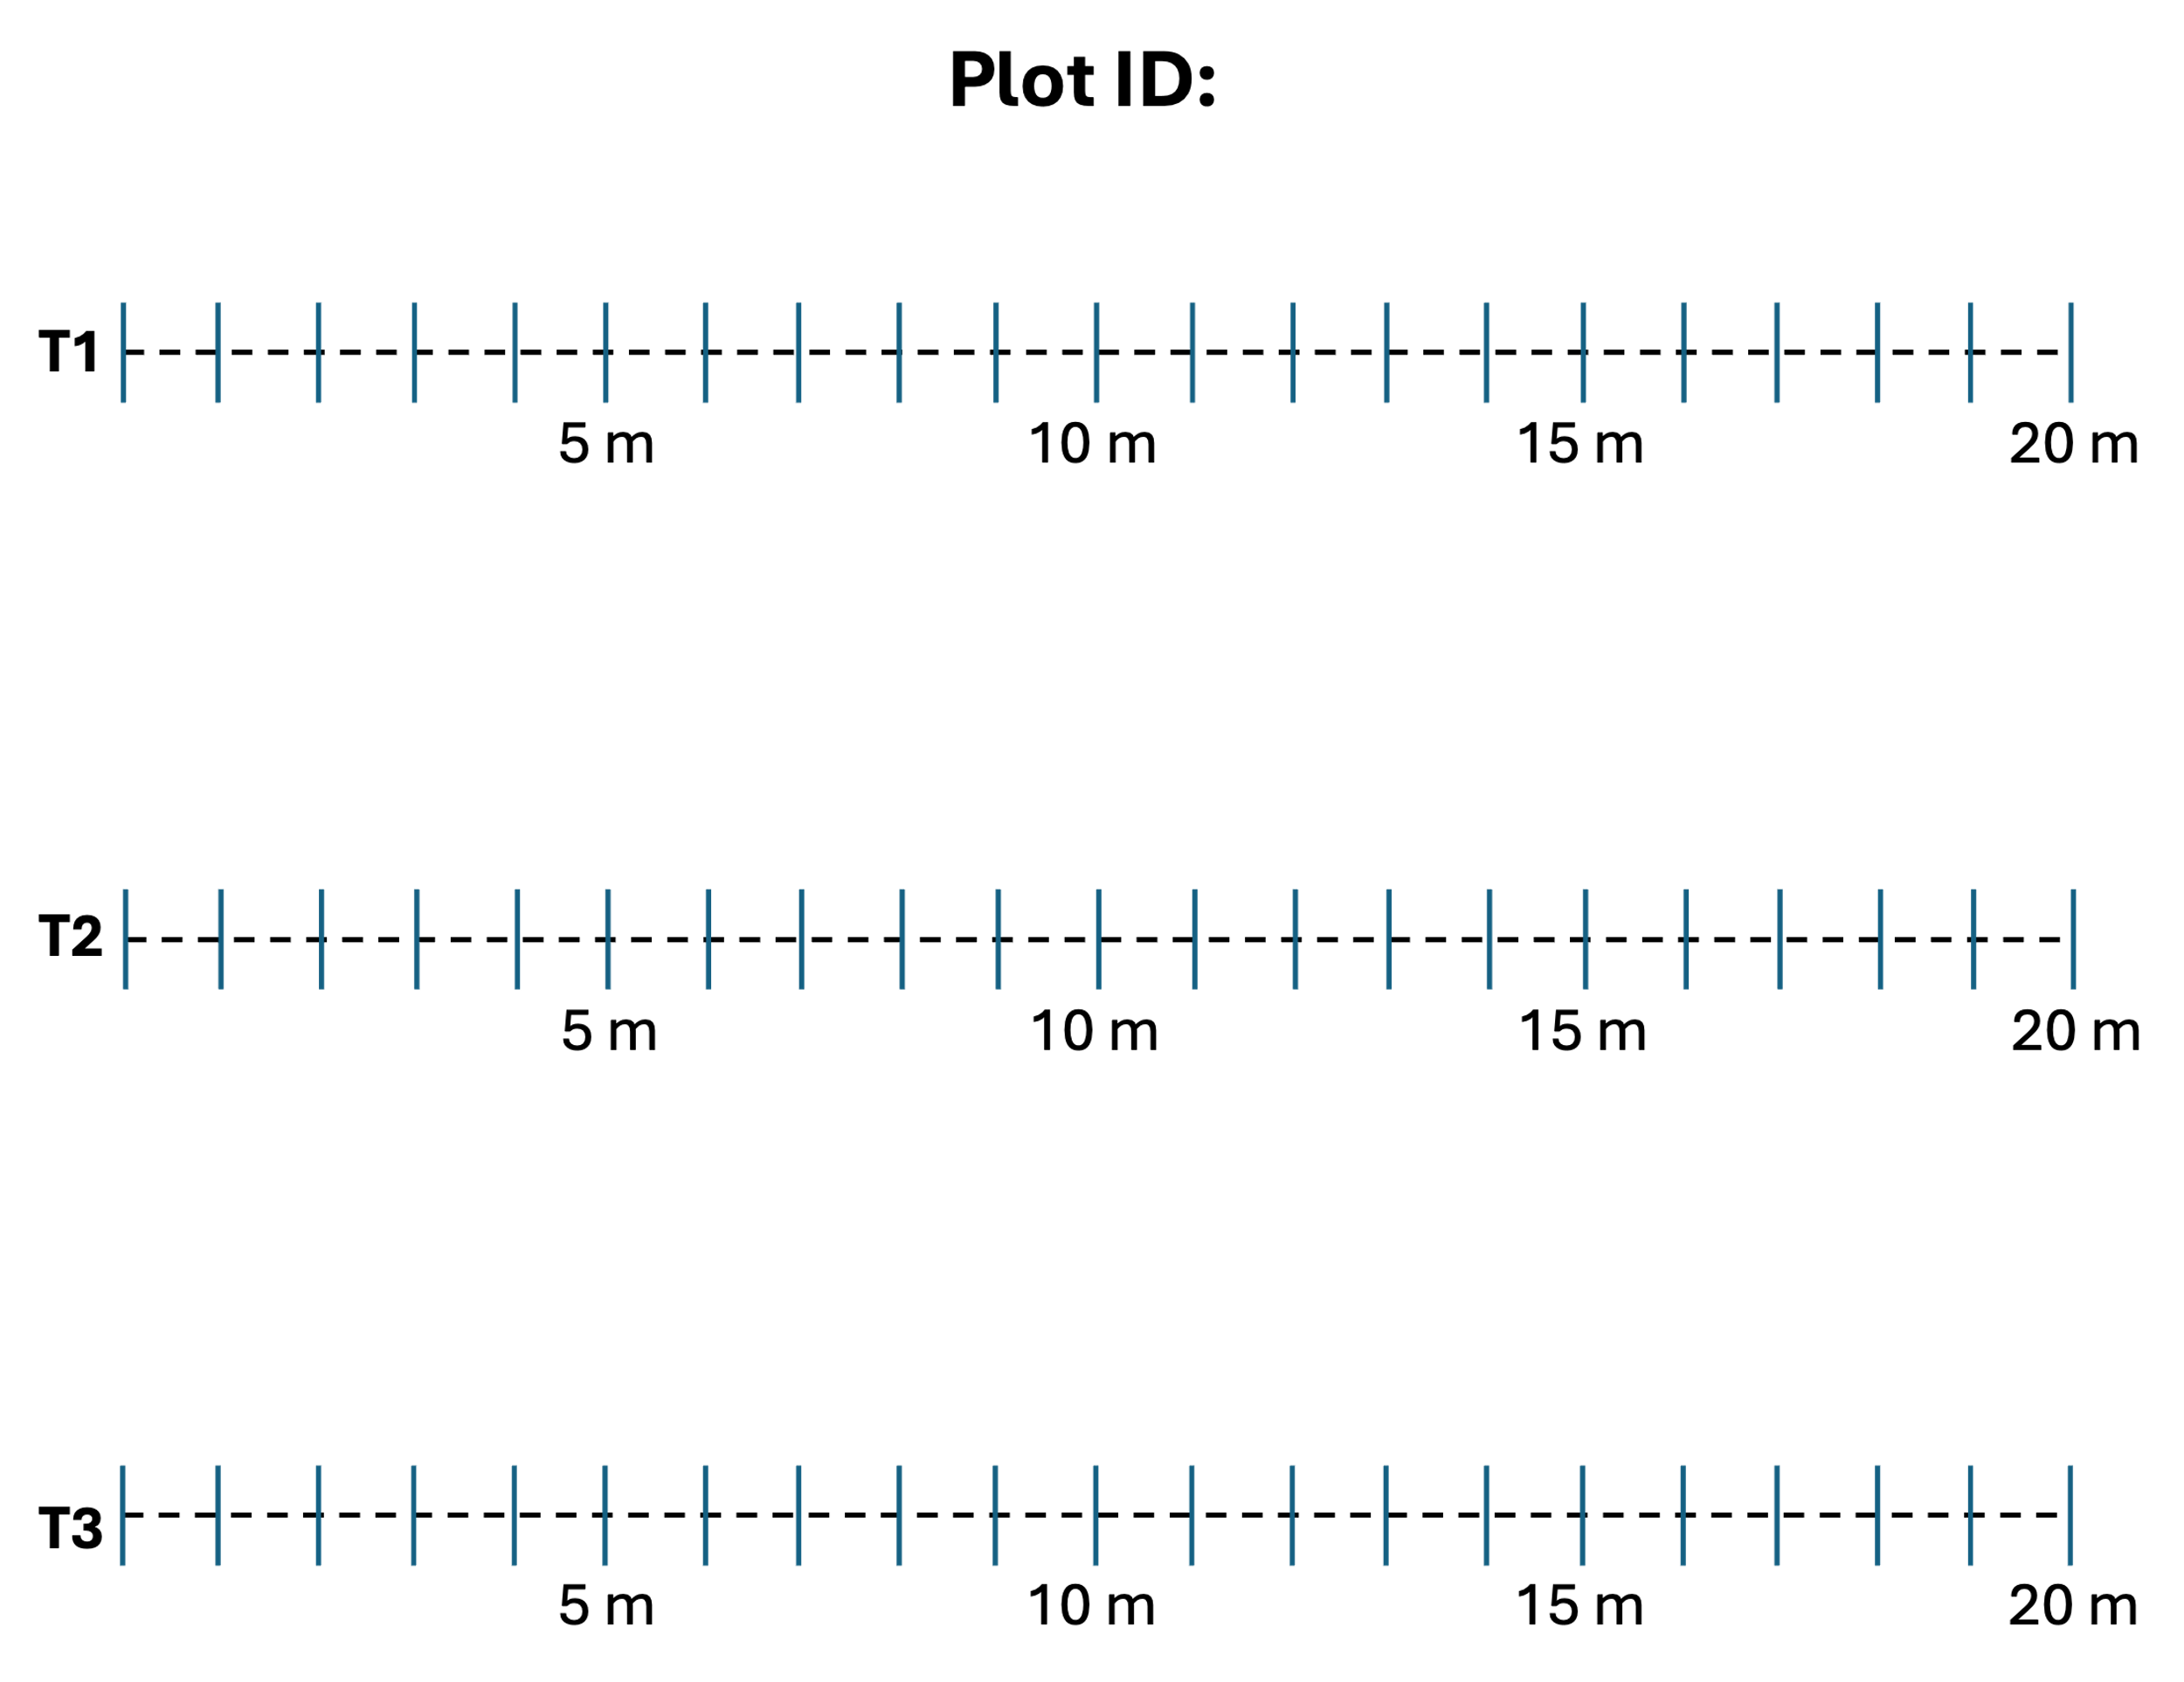
Leave bare soil unmarked
Example: Template 1 filled using Figure 2 data.
![]()

This research was funded by Biodiversa+, the European Biodiversity Partnership, in the context of the PhorestAll project under the 2023-2024 BiodivNBS joint call. It was co-funded by the European Commision (GA No. 101052342) and the following funding organisations: Fundação para a Ciência e a Tecnologia [PT], Narodowe Centrum Nauki [PL], National Science and Technology Council [TW], Ministrstvo za visoko šolstvo, znanost in inovacije [SI], and Lietuvos mokslo taryba [LT].